What GRNI Processing Does
GRNI (Goods Received Not Invoiced) tracks the gap between what's been received into inventory and what's actually been invoiced by the supplier. In Kinetic, a Manual GRNI Clearing document lets you close out that gap for receipts that will never get a real supplier invoice — without distorting your AP or GL.
- It shows that a receipt has been "closed" for reconciliation purposes, even though no supplier invoice will ever be entered against it.
- It helps reconcile your AP clearing accounts by matching the receipt value to a manual clearing document instead of a normal AP invoice.
- It does not create or post a standard AP Invoice transaction to the GL — but it's still visible and trackable in the AP Invoice Tracker.
Setup Requirements
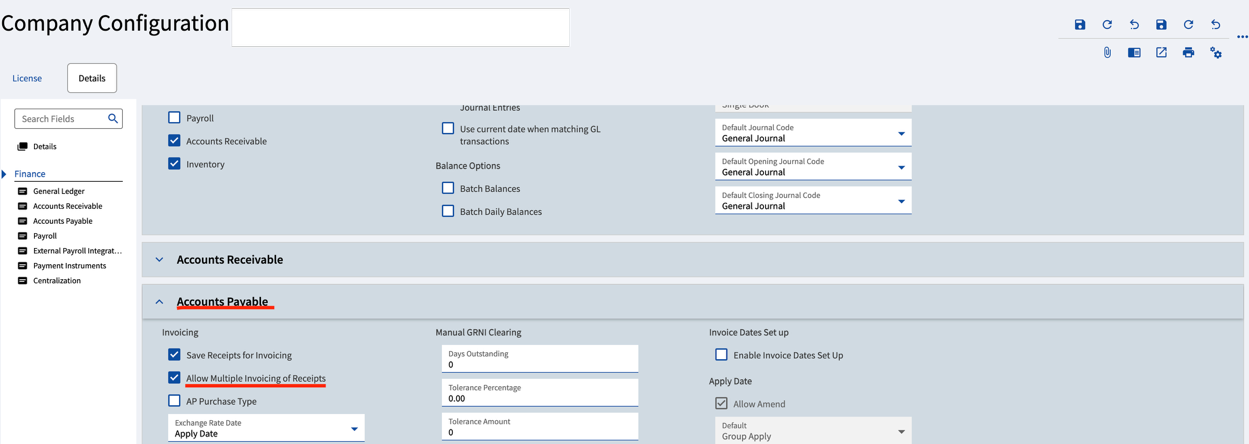
Before you can process a manual GRNI clearing, your Company Configuration needs to allow it:
Enable Manual GRNI Clearing
Select Allow Multiple Invoicing of Receipts, then select the appropriate check boxes in the Manual GRNI Clearing section.
Step 1: Run the Received Not Invoiced Report
Start by identifying which packing slips actually need to be cleared. Run the Received Not Invoiced Report to see open receipts that haven't been matched to a supplier invoice.
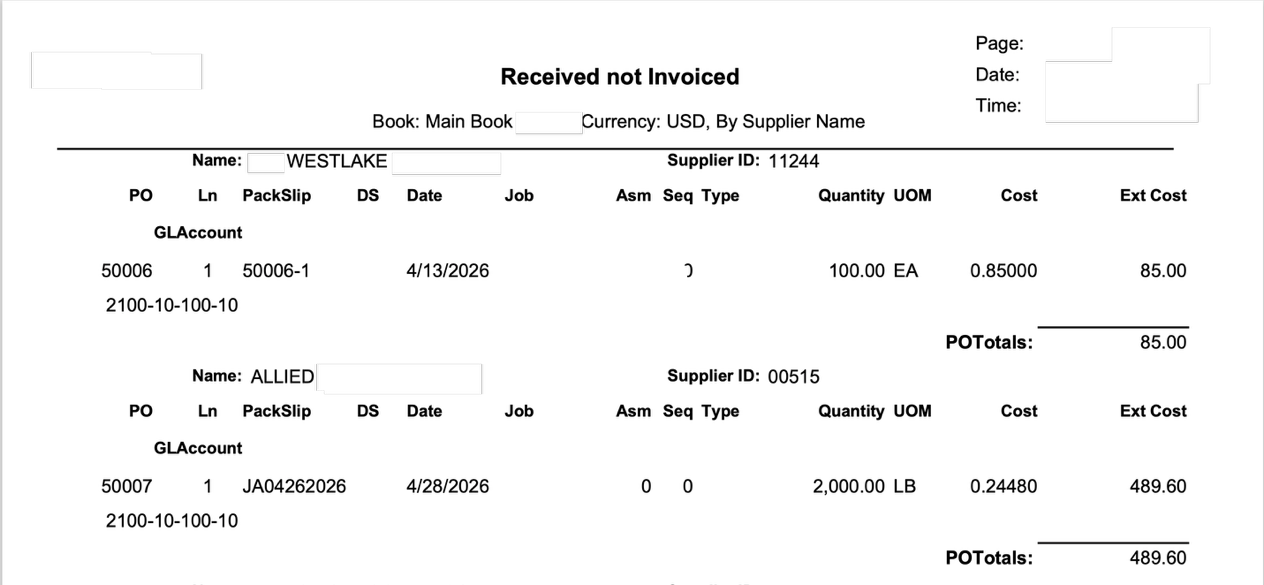
For this example, the goal is to clear the packing slip for supplier Westlake, PO 50006.
Step 2: Create the Manual GRNI Clearing Invoice
Start an Invoice Group
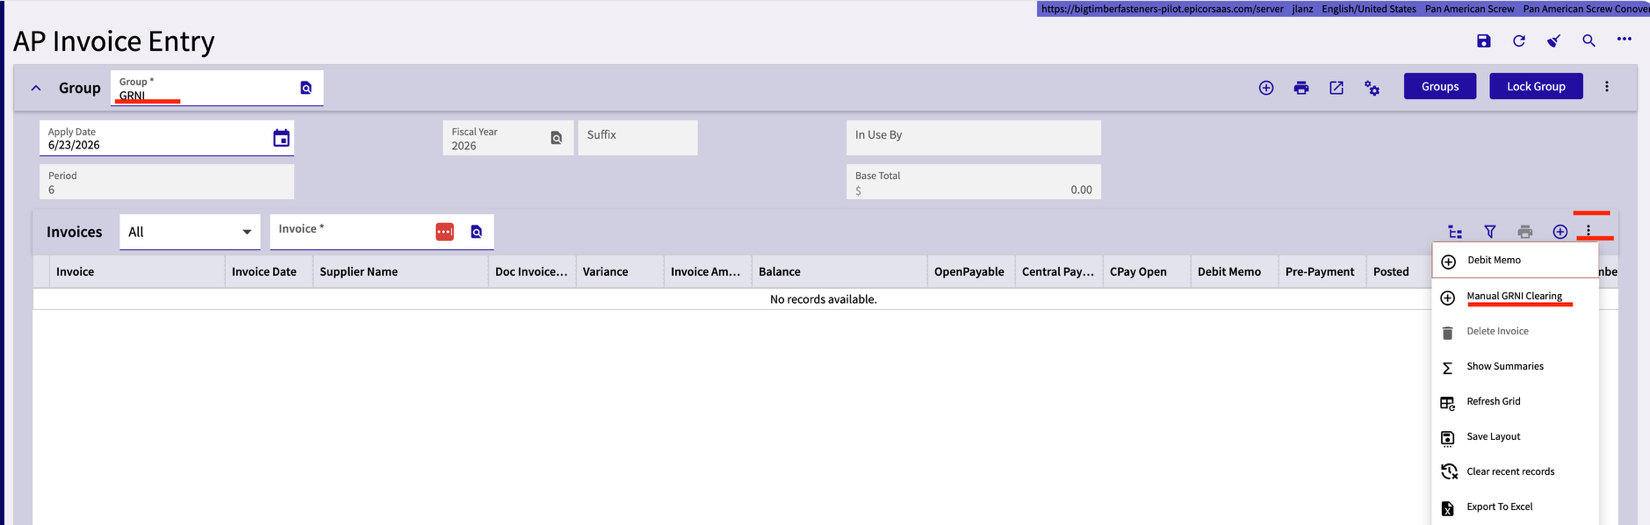
In AP Invoice Entry, create a group and save it.
Select Manual GRNI Clearing
From the Invoice card overflow menu, select "Manual GRNI Clearing." The Invoice entry screen displays.
Step 3: Enter the PO Number
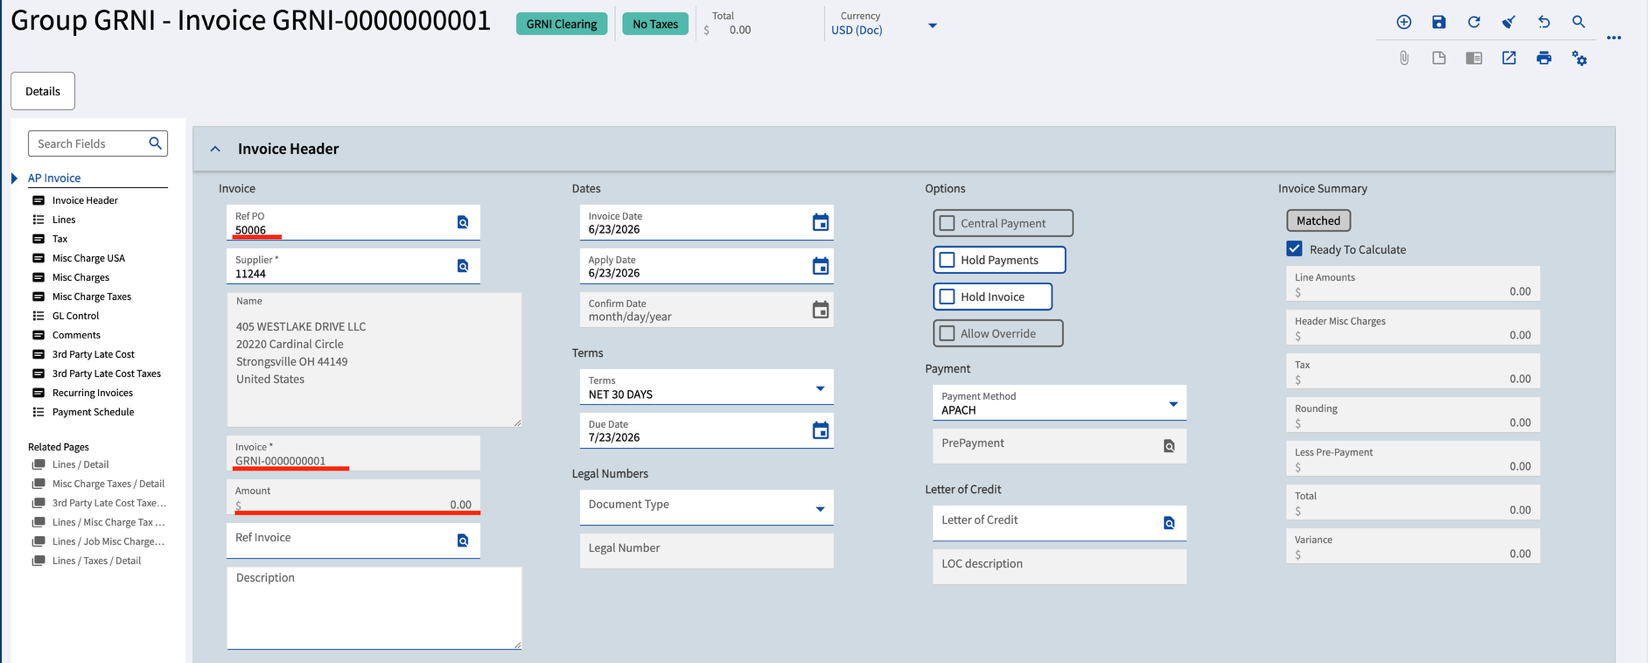
Enter the PO number. The system retrieves the information for that PO automatically. Notice that the Invoice # and Invoice amount fields are grayed out — this is expected, since a real invoice is never posted. Save the record.
If you have multiple POs for the same supplier, select the supplier first. When you get to Receipt Lines, the system will display all PO receipts for that supplier so you can choose the right one.
Step 4: Select the Receipt Line to Clear
Open Receipt Line Selection
From the Invoice lines card, select "Receipt Line."

A slider window appears showing the receipts available for the PO. Click the receipt you want to clear.
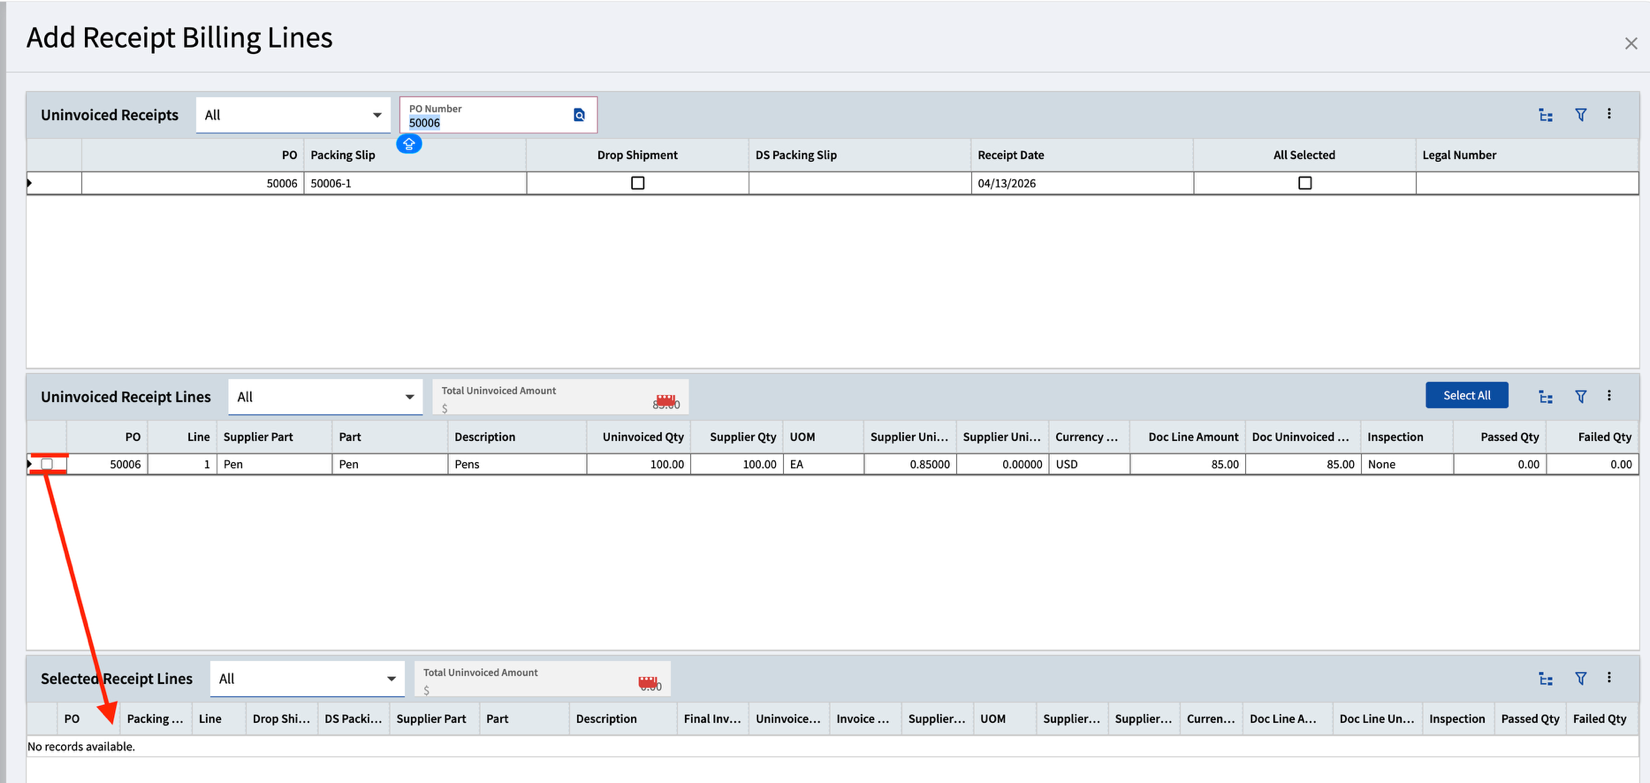
Once selected, the receipt moves to the "Selected Receipt Lines" card.
Step 5: Create the Clearing Line
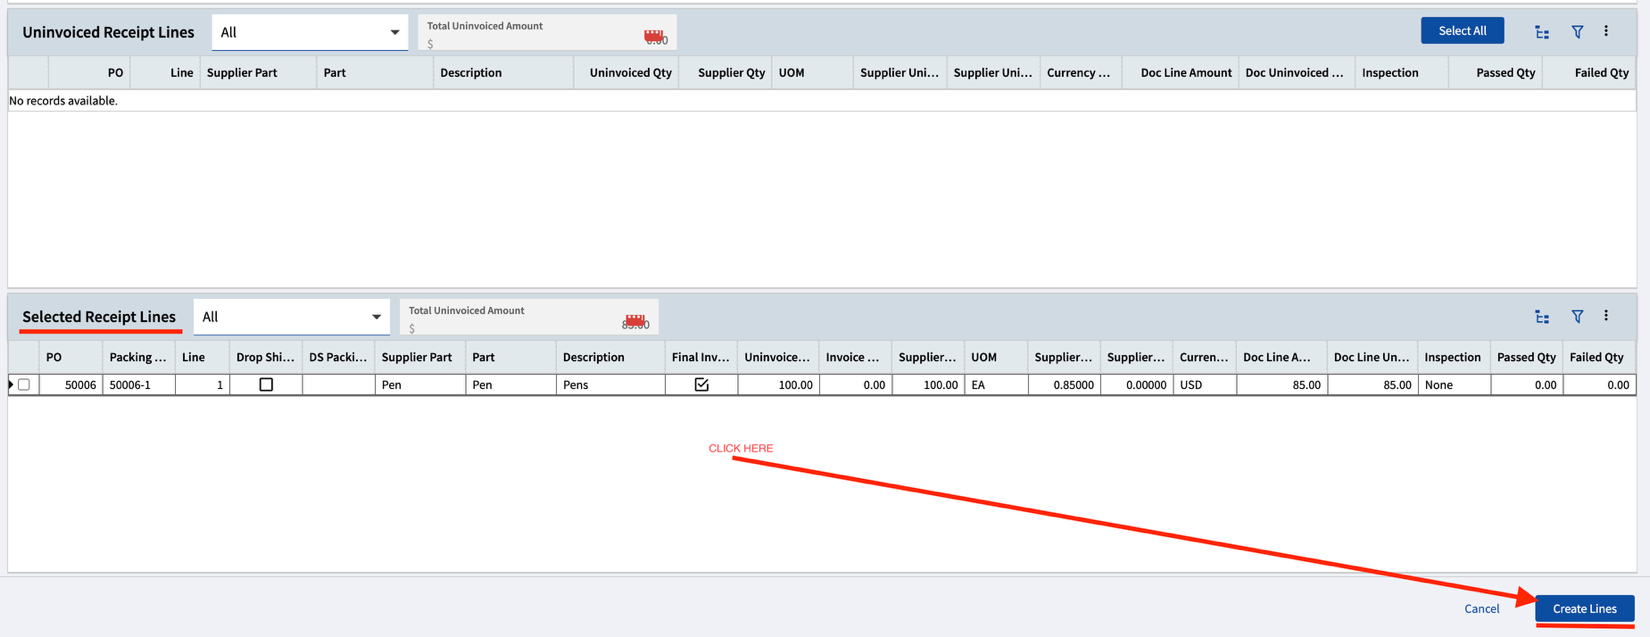
Click the blue "Create Lines" button at the bottom right. This generates an invoice line at zero dollars — confirming no real AP liability is being posted.
Step 6: Run the Edit List
Run the Edit List to confirm the clearing document looks correct before posting.
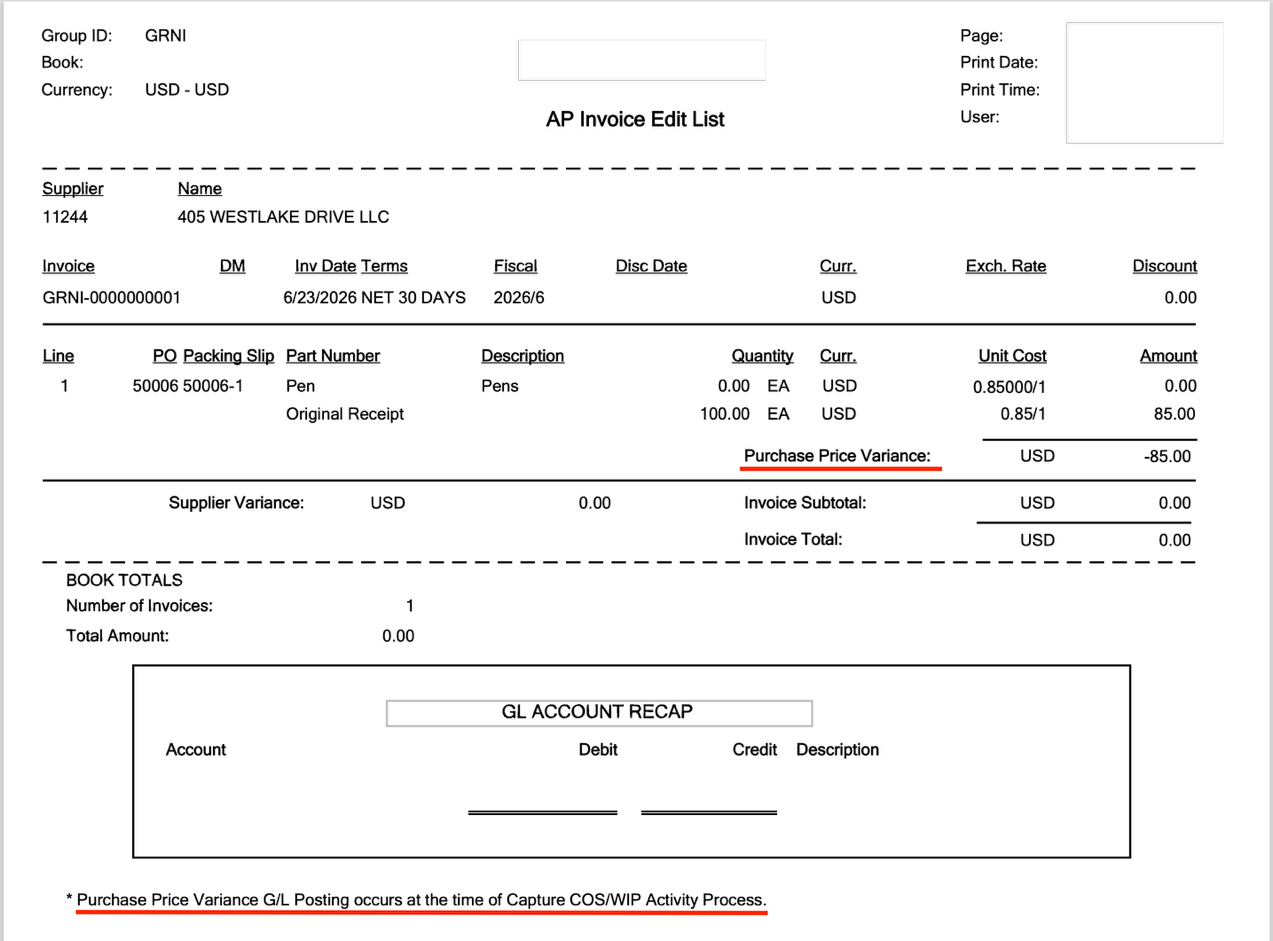
Notice there's no GL distribution on this transaction — that's by design. Any value variance from the original receipt will instead show up as a Purchase Price Variance (PPV) on the Inventory WIP Reconciliation report, not on the AP clearing account. Review that report as part of your normal close process to make sure the PPV is expected.
Still Stuck? We Can Help.
If this guide didn't fully resolve your issue — or your GRNI balances aren't reconciling — our Epicor consultants are available same-day. No long-term contract required.